Have you ever noticed a deep scratch on your new car and felt disappointed? This is a common but frustrating experience for many vehicle owners. Your car is much more than transportation; It is an entity that reflects your personality. Deep scratches on your car’s parts not only look unsightly, but can also cause damage to your beloved car. But don’t worry! This guide will walk you step by step to remove deep scratches from your car so you can put them to rest.
Whether the scratch is from a broken car, a brush from a tree, or a minor accident, there are some effective ways to treat it at home. With the right tools and techniques, you can return your vehicle to its original condition and preserve its value. From understanding the different types of car scratches to determining whether you can repair a scratch at home, we’ll cover everything you need to know to repair a deep scratch on your car.
So roll up your sleeves and get ready to give your car a fresh coat of paint. With a little effort and proper guidance, you can remove deep scratches and enjoy the original look of your vehicle again. Let’s jump!

Key Highlights
- Deep scratches on a car can be frustrating and de your vehicle, but they can be fixed at home with the tools and techniques.
- Using a scratch kit, such as one that includes a polishing compound and buffing pads, can effectively remove deep scratches.
- It is important to clean the affected area, fill any cracks with glazing putty, apply touch-up paint, and buff the repaired area for a seamless finish.
- While DIY methods can be effective for minor scratches, deeper scratches and those that expose the bare metal may require professional help.
- By following a step-by-step guide and taking necessary precautions, you can restore your car’s appearance and maintain its value.
Understanding Car Scratches
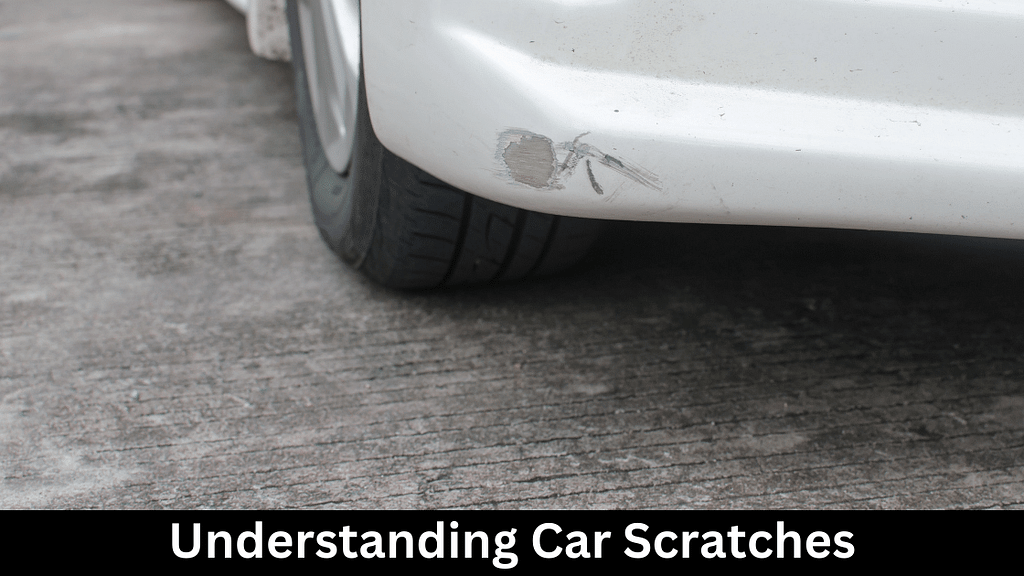
Car scratches can vary in severity, from minor surface scratches to deeper scratches that expose the bare metal. Understanding the different types of car scratches is essential in determining the best approach for repair.
Minor scratches, such as from keys or light brushing, usually only affect the clear coat and can be easily repaired at home. Deeper scratches, on the other hand, may require further treatment, especially if the primer or bare metal is exposed. It is important to assess the severity of the scratch before attempting treatment.
The Various Depths of Car Scratches and Their Impact
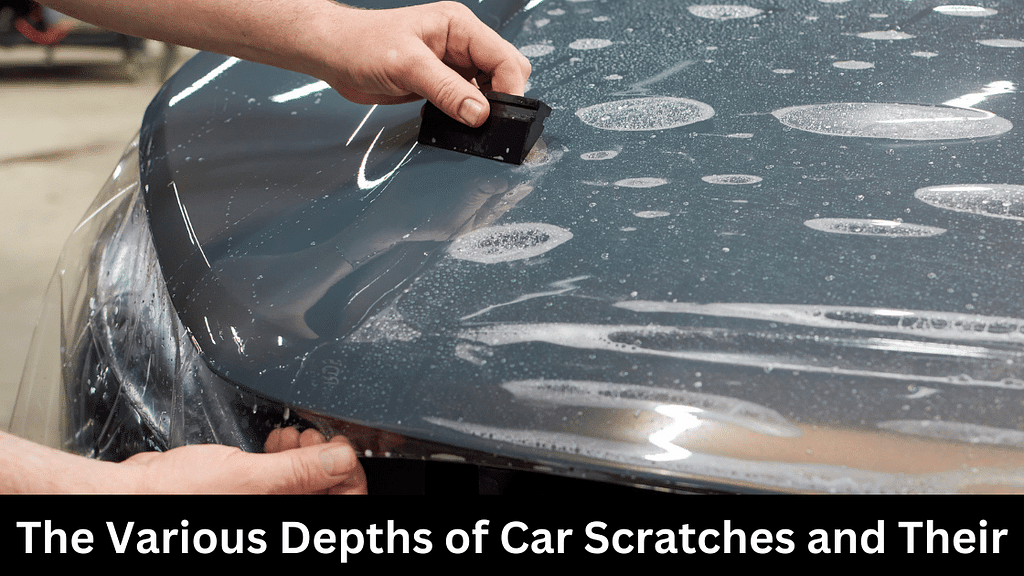
Car scratches can vary in depth, and each level of depth has a different impact on the appearance and integrity of your car’s paint. Minor scratches that only affect the clear coat are the most serious and can usually be repaired using the DIY method. These scratches do not penetrate the paint finish and can usually be repaired using a light polish or scratch remover.
On the other hand, deep scratches that reach the lining or expose bare metal require a more extensive repair process and may require professional assistance. Varnish scratches are the most common, affect only the outer layer of the paint, and can be repaired with the right method. Understanding the depth and impact of scratches on a car is important in determining the appropriate repair.
Identifying If a Scratch Can Be Repaired at Home
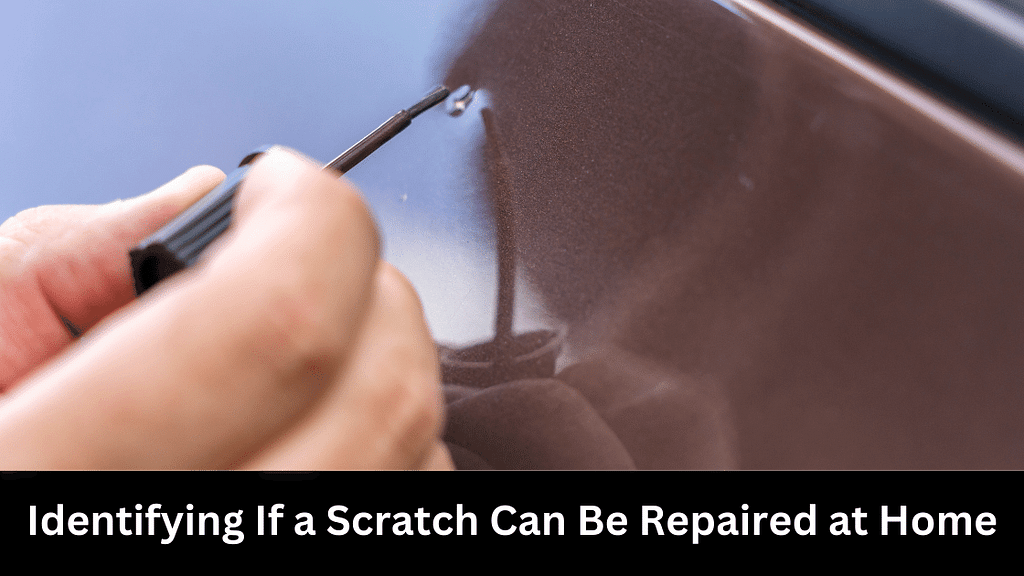
Not all excavators require service. You can save time and money by deciding whether the scratch can be repaired at home. Minor scratches that only affect the clear coat or slightly penetrate the primer can often be repaired with DIY methods. These scratches do not require much repair and can be repaired using scratch removal or scratch removal products.
However, deep car scratches that penetrate the undercoat or expose bare metal may require professional help. It’s important to assess the severity of the scratch and consider the tools and materials needed before trying to repair something at home. If you’re unsure of your ability to repair a deep scratch, it’s best to seek help to prevent further damage to your car’s paint.
Preparing for the Repair Process

Before starting the renovation process, you should prepare and gather the necessary tools and materials. Having the right tools and following safety precautions will ensure the repair is done properly and prevent further damage to your vehicle’s paintwork. Make sure you have a scratch repair kit, microfiber cloth, rubbing alcohol, and sandpaper on hand.
It is also important to wear gloves and goggles to protect yourself during treatment. Taking these precautions and using the appropriate equipment will make the repair process more efficient and effective.
Tools and Materials Needed for Deep Scratch Repair
Repairing a deep scratch on your car requires specific tools and materials to ensure a successful result. Here are the tools and materials you will need for the repair process:
- Scratch repair kit: This kit typically includes a polishing compound, buffing pads, and sometimes additional solutions for deeper scratches.
- Microfiber cloth: This soft cloth is perfect for cleaning and buffing the affected area.
- Rubbing alcohol: Use rubbing alcohol to clean the surface before repair to remove any dirt or residue.
- Sandpaper: Depending on the depth of the scratch, you may need different grits of sandpaper for sanding the area.
- Spreader tool: This tool is used to apply glazing putty evenly on the scratched area.
Having these tools and materials ready will make the repair process more efficient and ensure a seamless result. Make sure to follow the instructions provided with the scratch repair kit and use the tools and materials safely.
Safety Measures and Precautions Before Starting

When repairing a deep scratch on your car, it is important to take safety measures and precautions to protect yourself and your vehicle. Here are some safety measures to consider before starting the repair process:
- Wear gloves and eye protection to protect yourself from any chemicals or debris.
- Work in a well-ventilated area to avoid inhaling any fumes from the products used.
- Ensure that your car is parked in a safe location, away from traffic or other hazards.
- Protect surrounding areas of the car with masking tape or plastic sheeting to prevent any accidental damage.
- Follow the instructions provided with the scratch repair kit and other materials to ensure proper usage.
Taking these safety measures will help you complete the repair process safely and efficiently. The good news is that by following the step-by-step guide and using the right tools, you can restore your car’s appearance and protect its value.
Step-by-Step Guide to Fixing a Deep Scratch
Now that you have the right tools and safety precautions, let’s move on to our step-by-step guide to repairing deep scratches on your car. This guide will guide you through the restoration process, from cleaning the affected area to applying touch up paint. By following these steps carefully, you can repair deep scratches and restore your car to its original condition. Get started!
Step 1: Cleaning the Affected Area
The first step to repairing deep scratches on your car is to clean the affected area. Cleaning the area to ensure there is no dirt or debris that could hinder the restoration process. Here’s how to clean the affected area:
- Use a microfiber cloth to wipe away any loose dirt or debris from the scratch.
- Dampen the microfiber cloth with rubbing alcohol.
- Gently clean the scratch and the surrounding area with the damp cloth, applying light pressure.
- Allow the area to dry completely before proceeding with the repair process.
Cleaning the affected area ensures a clean surface for the repair and helps the products used in the repair process adhere properly. Take your time and ensure that the area is clean and dry before moving on to the next step.
Step 2: Sanding the Scratch
After cleaning the affected area, the next step in treating deep scratches is to sand the scratches. Sanding prepares the surface for restoration by helping to remove any rough edges or imperfections. Here’s how to polish scratches:
- Start by selecting the appropriate grit of sandpaper. Use a lower grit, such as 2000-grit, for base coat scratches and progress to a higher grit, such as 3000-grit, for a smoother finish on the layer of paint.
- Wet the sandpaper with water to prevent clogging and create a smoother surface.
- Gently sand the scratched area using light pressure and a circular motion. Be careful not to apply too much pressure or sand too aggressively, as this could damage the surrounding paint.
- Continue sanding until the scratch is smooth and any rough edges are removed.
- Wipe away any sanding residue with a clean microfiber cloth.
Sanding the scratch helps create a smooth surface for the following repair steps and ensures a seamless result. Take your time and be mindful of the pressure applied during the sanding process.
Step 3: Applying a Primer and Paint
After sanding, the next step is to apply primer and paint to the treated area. This step helps ensure that the treated area matches the surrounding color. Here’s how to apply primer and paint:
- Apply a thin layer of primer to the sanded area using a brush or sponge. Allow the primer to dry completely according to the manufacturer’s instructions.
- Once the primer is dry, apply a base coat of paint that matches your car’s color. Use a brush or sponge to apply the paint evenly, covering the entire repaired area.
- Allow the base coat to dry completely before moving on to the next step.
Applying a primer and paint helps create a uniform surface and ensures that the repair is seamless. Make sure to follow the manufacturer’s instructions for drying times and application techniques to achieve the best results.
Step 4: Clear Coat Application
After applying the primer, the next step is to apply a coat of varnish to protect the treated area and give it a finish. Here’s how to apply the clear coat:
- Use a clear coat applicator or a brush to apply a thin, even layer of clear coat over the repaired area.
- Allow the clear coat to dry completely before moving on to the next step.
- If necessary, apply additional layers of clear coat to achieve the desired level of protection and glossiness.
Applying a clear coat helps protect the repaired area and gives it a professional finish. Make sure to apply the clear coat evenly and allow it to dry completely before proceeding with the next step.
Step 5: Polishing the Repaired Area
The final step in repairing a deep scratch on your car is to polish the repaired area to blend it in with the surrounding color and restore its shine. Here’s how to polish the repair:
- Apply a small amount of polishing compound to a clean buffing pad.
- Using a circular motion, gently buff the repaired area, applying light pressure.
- Continue buffing until the repaired area is smooth and blends seamlessly with the surrounding paintwork.
- Wipe away any excess polishing compound with a clean microfiber cloth.
Polishing the repaired area helps achieve a seamless finish and restores the shine to your car’s paintwork. Take your time and be mindful of the pressure applied during the buffing process to avoid damaging the paint.
Aftercare Tips for Maintained Finish
Now that you’ve finished repairing deep scratches on your car, it’s important to do some maintenance to the paint and the repaired area. Here are some tips for aftercare:
- Regularly wash your car with a pH-neutral car wash soap to remove dirt and debris.
- Apply a coat of wax or polish to the repaired area to provide an additional layer of protection.
- Avoid abrasive materials or aggressive washing techniques that could cause damage to the paintwork.
- Regularly inspect the repaired area for any signs of damage or additional scratches.
By following these aftercare tips, you can ensure that the repaired area remains in good condition and maintains its appearance.
How to Protect the Repaired Area from Further Damage
After repairing a deep scratch on your car, it is important to take the necessary precautions to protect the repaired area from further damage. Here’s how to protect your treatment area:
- Apply a protective layer of car wax or paint sealant to the repaired area. This will help protect the paintwork from UV rays, dirt, and other environmental factors.
- Regularly wash and wax your car to maintain the protective layer and keep the paintwork in good condition.
- Avoid parking your car in areas where it is likely to come into contact with objects that could scratch or damage the paintwork.
- Be mindful of any activities or objects that could potentially cause damage to the repaired area and take necessary precautions to prevent it.
By taking these protective measures, you can prolong the lifespan of the repair and ensure that the repaired area remains in good condition.
Recommended Products for Maintaining Car Paint
When it comes to maintaining your car’s paint, there are many recommended products that can help keep your car looking its best. Some recommended products for car paint care include:
| Product Name | Description |
| Scratch Repair Kit | A comprehensive kit that includes a polishing compound, buffing pads, and other tools for repairing and maintaining car paint. |
| Microfiber Towel | A soft and absorbent towel that is perfect for cleaning and buffing car paint. |
| Car Polish | A product that contains mild abrasives to smooth out imperfections in the paint and restore shine. |
Using these products regularly can help maintain the appearance of your car’s paint and keep it looking its best. Make sure to follow the instructions provided with each product for optimal results.
When to Seek Professional Help
Although DIY is effective at repairing deep scratches on your car, sometimes calling for service is the best option. Here are some situations where seeking professional help is recommended:
- If the deep scratch is too severe or extensive to be repaired using DIY methods.
- If the repair requires specialized tools or expertise that you do not possess.
- If your car is still under warranty and you want to ensure that the repair does not void the warranty.
- If you are not confident in your ability to effectively repair the deep scratch.
By seeking professional help, you can ensure that the repair is done correctly and maintain the value and appearance of your car.
Understanding the Limitations of DIY Repair
While DIY repairs are good for minor scratches and some deep scratches, it’s important to understand their limitations. Some of the limitations of DIY repair include:
- DIY methods may not be able to completely remove deep scratches that have significantly impacted the paintwork.
- DIY repairs may not achieve the same level of quality and durability as professional repairs.
- DIY repairs may require more time and effort compared to professional repairs.
- DIY repairs may not provide the same level of warranty or guarantees as professional repairs.
It is important to assess the severity of the deep scratch and consider the limitations of DIY repair before deciding on the best course of action.
Signs That You Need Professional Scratch Repair
While the DIY method is good for in depth research, there are some signs that art is needed. Here are some signs you should seek professional help:
- Deeper scratches that have significantly impacted the structure of the car’s body.
- Deep scratches that have exposed the bare metal or caused damage to the underlying structure.
- Deep scratches that require extensive sanding, filler, or repainting.
- Deep scratches that are beyond your skill level or comfort zone.
If you notice any of these signs, it is advisable to take your car to a reputable body shop for professional repair. Professional technicians have the expertise and specialized equipment to effectively repair deep scratches and restore your car’s appearance.
Conclusion
All in all, repairing deep scratches on your car is a manageable job with the right tools and techniques. You can return your vehicle to its former state by following the cleaning, sanding, priming, painting and polishing processes. Be sure to protect the treated area from further damage and consider getting help for difficult digging. Maintaining a good paint job not only improves the appearance of your vehicle but also maintains its value. Follow instructions for aftercare and products for long-lasting results. A well-maintained car reflects your care and attention to detail and ensures longevity on the road.
Learn How to Remove Tint from Car Windows Easily
Frequently Asked Questions
Can Deep Scratches Affect Car Value?
Yes, digging deep can affect your car’s value. Deep scratches can be distracting and reduce the overall beauty of the car. Additionally, if deep scratches are left untreated, they can cause further damage such as rust, which can increase the value of the vehicle.
How Often Should I Polish the Repaired Area?
How much you polish the treated area depends on many factors, such as the quality of the application and the condition of the vehicle surface. As a general rule, it is recommended to polish the treated area every few months to maintain surface quality and maximize color.
Is It Possible to Completely Remove a Deep Scratch?
Although it cannot remove deep scratches, it can improve its appearance and blend in with the surrounding color. By following the instructions step by step and using the right tools and techniques, you can achieve a flawless repair and reduce the appearance of deep scratches.
What Are the Risks of DIY Scratch Repair?
DIY scratch repair comes with some risks, such as the potential to damage the condition of the area if not done properly. DIY methods will not achieve the same level of efficiency and durability as professional repairs. It’s important to evaluate your skill level and comfort level before trying DIY scratch repair.